So it had to go. The issue is, what does the hole look like? Fortunately, the answer was "not too bad", so I set about tidying it up so it would look reasonable with books in it on site. It was important to make the process reversible, so the microwave can be put back when we come to sell the 'van.
The first problem was the exposed wiring - up the side and across the bottom. I bought some self-adhesive 22mm D-line trunking from TLC Direct and hid the wires in that - it is wood grain effect, so doesn't quite match the plain brown trunking used by Bailey. The vertical bit is stuck to the side of the space, the horizontal bit is stuck to the back, just high enough to get the floor panel (see later) under it. The corner joint has its bottom cut out, and there is a hole in the horizontal piece to allow the connection to the downlighter. The large ventilators in the side were moved from their original position on the other side of the panel where they were inside lockers.
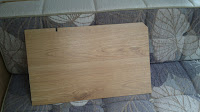
I made the bottom panel from Correx board - I think I've seen it in Hobbycraft, but you can certainly get it on-line. It is quite strong and virtually weightless. This was cut to fit the cupboard bottom, complete with slot for the light wire. I then covered the top surface with B&Q vinyl floor planks, natural oak finish.
With the bottom slotted in, the slots in the side filled with carefully cut layers of the vinyl planks, and a few screw caps, I reckon the job's a good 'un. Just waiting now for Bailey to come up with some gallery rail to match the rest of the shelves.
 |
| Nearly finished |
 |
| The gallery rail |
My brother has done a similar, but rather fancier, job on his Swift Challenger - see http://caravan-microwave.blogspot.co.uk/


No comments:
Post a Comment