Friday, 30 August 2013

Installing the Whale Watermaster IC pump controller


This amazing little yellow box of electronics takes over the running of your water pump from the always-dodgy pressure switch.  No more pulsing, and no more pump running dry!

The instructions make installation look simple - as they would be but for the way Baileys plumbed the original inlet.  In fact access, through a hole in a wardrobe shelf, was always going to be tricky.


Extract from the Whale installation instructions
The elbow that they used to connect the internal pipework ran tightly across the back of the inlet, so none of the bits and pieces could readily be accessed.  This was resolved after discussions with Whale's tech support by removing the elbow and putting a straight connector and a short length of rigid pipe (supplied by Whale, thanks guys) between the inlet and the elbow.

The IC wired and ready to install
The pressure adjusting screw and fixing screw, and the connections, were then easy to remove.  NOTE don't make the mistake I made and remove the fixing screw before pulling the spade connectors off - I somehow managed to dislodge one of the contact springs in the external pump connector housing that power the pump motor.

The complete assembly
After that, it is easy to reassemble the whole thing, and the clearance behind the unit makes getting to the calibrate button and seeing the LED a doddle.


In use, the water flow is much smoother, but I haven't tried the "run dry" feature yet.

Wednesday, 3 July 2013

A few cupboard improvements

Really useful boxes
The cupboard under the sink has a useful cutlery tray and two additional shelves.  It looked like the place to store kitchen utensils, but what in?

The Really Useful Box was the answer - 6.5 litre boxes are a good fit on the shelves, provided you are prepared to vandalise them by removing the locking handles and sawing off the protrusion the handles clip round.

The cupboard door, like several others in the 'van, was prone to rattling, but these were easily fixed by sticking on a few of the little self-adhesive plastic bumps that are used by kitchen fitters.  One is visible on the edge just next to the top shelf.

Payload - the final figure

Having done all the messing about, we come to the crunch figure.  By having the upgrade, carrying some things in the car and just removing others, we come up with a usable payload of 179kg


Basic payload 127.0
Uprate 14.0
Don't carry water 10.0
Remove microwave 12.2
Wheel lock in car 5.0
Replace carpet 6.3
Mains lead in car 4.5
TOTAL 179.0

From the previous list of items totalling 52.5kg we can remove the Aquaroll and waste carrier to the car saving 7.5kg.  So the payload available for clothes and food is now 179-45 (for stuff) - 30 (mover) -28 (battery) leaving a much improved 76kg.

Subject to a weighbridge test, of course.

Sunday, 30 June 2013

Storing the crockery

 Another of the slight design faults in our Pegasus GT65 Genoa is the crockery storage.  If you look back at the layout diagram in the first entry on this blog, you can see that the kitchen sink sticks out into the van (the gas locker is behind it).  The plate and mug racks are in the locker above this point, and are very difficult to reach if you are not very tall (I am 5'7"½, wife even shorter).
There was a nice wide upper shelf in one of the other kitchen cupboards that we had not found a use for, so I looked round for ways we could store our (melamine) crockery on it.  A useful idea came from this Australian website, though I haven't the skills or facilities to work in plastic like he does.
I turned once again to my trusty pack of Correx board, and cut a piece to fit the shelf exactly.  I then marked on it the positions of the large plates, small plates and cereal bowls.  I made little stand-ups to go behind the smaller items and cut 6 four-inch lengths of dowel, which are just screwed to the Correx from below with 5/8" woodscrews.
It looks OK, and it seems to work, but only time will tell if it is the answer.

Solar battery charger

The Bailey Pegasus GT65 caravans come with a socket in the battery box to plug in a solar panel.  We are not great users of sites without mains, so we didn't feel we particularly needed to use a solar panel on site.
However, it would be very useful to be able to keep the battery topped up while in storage, so that the mover stands a chance of working.  Obviously it would be better to keep the panel inside the 'van so it is less likely to get nicked.  So I pulled the spade connectors off the back of the built-in socket, and plugged them into some insulated spade sockets wired to a car lighter socket.  The picture shows the socket and the wiring with the in-line fuse before tidying up.
I bought a 10W panel and adapted its wiring by removing the rather cheap croc clips and fitting a length of Halfords twin speaker cable (we're only talking about a max current of a few hundred mA) and a car lighter plug.  I had to snip the LED out of the plug, as it would have wasted too much battery charge.
The panel just fits in the mini-Heki rooflight over the kitchen area, where it sits comfortably on the bars at the end of the flyscreen and blind, which have to be pulled out an inch or so.
It went into operation today, so we won't know how successful it is until we go to collect!

Update 3 July - the battery was charging at 13.3V on a cloudy bright afternoon.

Table storage

The original table storage...
 There are one or two slight design faults in the new 'van.  One of them is the storage of the table in a sort of cradle, flat under the nearside lounge seat.  Getting the table out requires removal of at least the seat-back cushion and lifting the bed slats with one hand while the other hand (or other person) grabs the table.  This can easily result in nasty injury to the fingers, and I'm sure is not going to be good for the table or furnishings in the longer term.


...and the new
The solution was to find an alternative location for the table while we are on site.  We were pleased to find that it fits nicely just inside the door where it can be held by a single turnbuckle.  It's not the most beautiful piece of internal decor, but it saves a lot of cursing and trapped fingers.

Sunday, 23 June 2013

Instructions for Trio awning fibre frame pole set

Trio 2003 awning fibre pole assembly diagram

Not much to do with the d-i-y but I struggled to find this diagram on the web, so I thought it might be useful to post it - even if it is a crappy image.

Saturday, 22 June 2013

The damned microwave

Bailey GT65 microwave
We hardly ever use the microwave at home, I enjoy cooking when away in the 'van, so I really begrudge paying for a useless lump of stainless steel that occupies 12.2kg of my payload.  I know my brother uses his to store plastic boxes and a Caravan Club person he met at a show told him that he used his as a breadbin.

So it had to go.  The issue is, what does the hole look like?  Fortunately, the answer was "not too bad", so I set about tidying it up so it would look reasonable with books in it on site.  It was important to make the process reversible, so the microwave can be put back when we come to sell the 'van.
The space where the microwave had been in the GT65

The first problem was the exposed wiring - up the side and across the bottom.  I bought some self-adhesive 22mm D-line trunking from TLC Direct and hid the wires in that - it is wood grain effect, so doesn't quite match the plain brown trunking used by Bailey.  The vertical bit is stuck to the side of the space, the horizontal bit is stuck to the back, just high enough to get the floor panel (see later) under it.  The corner joint has its bottom cut out, and there is a hole in the horizontal piece to allow the connection to the downlighter.  The large ventilators in the side were moved from their original position on the other side of the panel where they were inside lockers.


The bottom for the microwave holeThe finished floor for the microwave hole

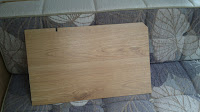
I made the bottom panel from Correx board - I think I've seen it in Hobbycraft, but you can certainly get it on-line.  It is quite strong and virtually weightless.  This was cut to fit the cupboard bottom, complete with slot for the light wire. I then covered the top surface with B&Q vinyl floor planks, natural oak finish.

With the bottom slotted in, the slots in the side filled with carefully cut layers of the vinyl planks, and a few screw caps, I reckon the job's a good 'un. Just waiting now for Bailey to come up with some gallery rail to match the rest of the shelves.
Nearly finished
The gallery rail


My brother has done a similar, but rather fancier, job on his Swift Challenger - see http://caravan-microwave.blogspot.co.uk/

Improving the payload

The basic payload of the Pegasus GT65 Genoa is 127kg - including, as is standard these days, 2 Calor Light gas bottles, 10 litres of water in the heater and everything the caravan comes with as standard.

A Powrtouch Evolution mover weighs in at about 30kg and a 110VA battery at 28kg, leaving 69kg for pots and pans, plates, glasses, clothes, food ...

We weighed in all the stuff we carry around - after reviewing everything, discarding loads of things and buying lighter alternatives for as many things as possible.  


Crockery & glasses 4.5
Cutlery & food prep 2.6
Pots, pans, chopping boards 4.6
Misc kitchen stuff 3.3
Cleaning stuff 1.6
Bedding 5.2
Bathroom stuff 2.6
Towels, tea towels etc 3.0
Flasks, plastic boxes etc 1.8
Toilet fluids, disinfectant etc 2.6
Books 3.0
Medicines, sponge bag 0.9
Lamp 0.4
Spice rack 0.7
Airer 1.0
Bucket 0.7
Levelling blocks, feet 4.7
Aquaroll 4.5
Waste container 3.0
Really useful boxes 0.8
Extinguisher 1.0
TOTAL 52.5

Leaving only 16.5kg for the rest
So we set about improving matters.  For a start, we can have a policy of emptying the water heater before towing - 10kg saved.  It is also possible to have the Maximum Technically Permissible Laden Mass uprated - though in this case only by a measly 14kg.  Nonetheless, it seemed worthwhile, if rather expensive.  I was happy to peel off the original rating sticker and add the new one, but I'm not sure why Bailey think you might want to replace the blue ovals front and rear with new ones that say "Bailey max load upgrade".


Now let's see what we can remove to improve things further...


Why am I doing it?

We've been caravanners for over 35 years, and it seems that every van needs some diy jobs to make best use of its space and payload.  The advances in technology and addition of facilities doesn't seem to have reduced the need.

So it seemed to be a good idea to share some of the bright (or maybe not-so-bright) ideas we've had - and maybe if anyone reads this they can share their ideas, or comment on the ones posted here.


Bailey Pegasus GT65 genoa


We've just changed our caravan for a new Bailey Pegasus GT65 Genoa, so the process has started all over again.  We've had to give in to the rear washroom - not too bad a waste of space in this 'van as it is quite compact.  We have managed to avoid a fixed bed - that would have involved a new car, and we didn't want one anyway.  Advancing years has, however, led us to have a mover for the first time, with the associated challenges to the payload, so this is where we start.